
 EN
EN
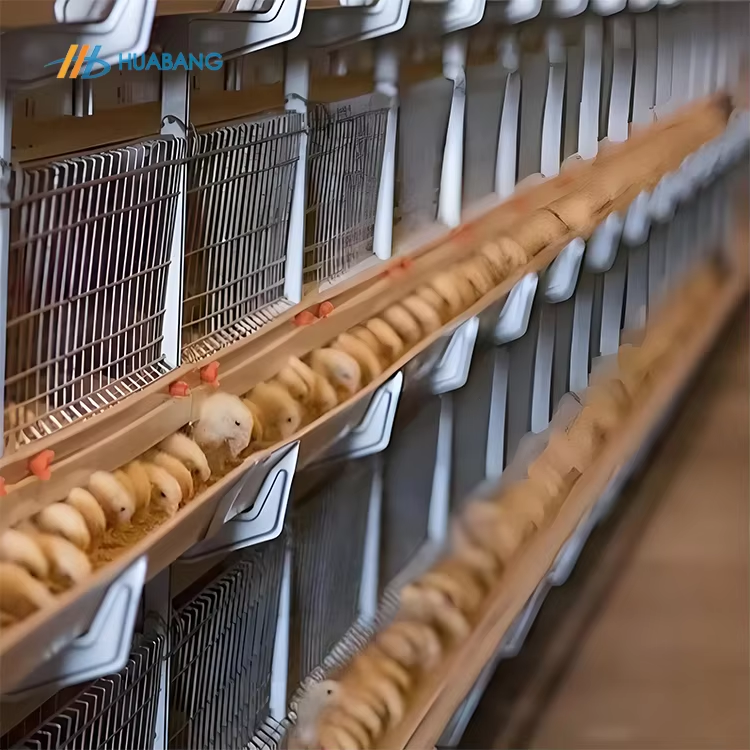
Installing Chicken Coop Cages: Site, Structure, and Setup
Site Selection and Foundation Preparation for Chicken Coop Cages
The longevity of chicken coop cages begins with a well-chosen, properly prepared site. Select a level area with natural drainage; a 1–2° slope away from the coop diverts rainwater and prevents pooling. In colder regions, frost heave can dislodge an unsecured base, so digging down 12 inches for concrete footings is essential. A 3-inch layer of angular ¾-inch crushed stone forms an ideal foundation—its interlocking edges deter weeds, discourage burrowing pests, and promote drainage. Avoid sand, as it shifts under weight and attracts rodents. For permanent standard chicken coop cages, construct a rectangular frame from pressure-treated lumber or galvanized steel, then anchor it with 12-inch steel spikes or J-bolts set in concrete. This base resists settling and keeps the structure square. In termite-prone areas, lay landscape fabric beneath the gravel to add a protective barrier. The goal is a stable, moisture‑free platform that minimizes future maintenance and ensures the coop remains level through seasonal temperature swings.
Assembly, Leveling, and Secure Anchoring of Chicken Coop Cages
Once the foundation is set, assembly demands precision. Erect the frame’s vertical columns—whether pre‑cut metal beams or treated lumber—and use a magnetic level to confirm plumb. Align horizontal beams carefully, checking that both diagonals match exactly to guarantee squareness. If using a prefabricated kit, hand‑tighten bolts first, then use a torque wrench to the manufacturer’s specification (typically 15–20 ft‑lbs) to avoid warping panels. Mesh panels or welded wire are affixed to the frame with corrosion‑resistant clips or screws, ensuring no gaps larger than ½ inch to exclude predators. Anchoring the completed structure is the final critical step. For temporary setups, 12‑inch steel spikes driven through pre‑drilled corner holes resist moderate wind. Permanent installations benefit from concrete footings paired with J‑bolts, which lock the frame against uplift and frost movement. After anchoring, re‑check all levels and retighten fasteners. A securely anchored coop not only stays upright in storms but also prevents shifting that could misalign doors or cause gaps compromising biosecurity.
Optimizing Chicken Coop Cages for Health and Productivity
Ventilation, Space Allocation, and Roosting/Laying Integration
Optimizing chicken coop cages for health and productivity requires balancing ventilation, space allocation, and roosting/laying integration. Adequate airflow is critical—ammonia buildup from litter can stress birds and cut egg production by up to 10% (Journal of Applied Poultry Research, 2022). Provide at least 1.5 square feet per bird inside the cage to prevent overcrowding, feather pecking, and disease spread (University of Georgia Extension, 2023). Overcrowding raises stress hormones and reduces feed conversion efficiency. Integrate roosting bars and nesting boxes into the cage layout to encourage natural behaviors: install perches with 8–10 inches of linear space per bird, placed higher than nesting boxes—but not directly over them—to avoid soiling. Nest boxes should be deep, darkened, and available at a ratio of one box per 4–5 hens. This setup boosts laying consistency and yields cleaner eggs, improving overall productivity by 5–8% (Poultry Science, 2020). Track conditions using simple hygrometers and thermometers to maintain the ideal 50–70% relative humidity and 65–75°F temperature range—key drivers of consistent egg production.
Maintaining Chicken Coop Cages: Cleaning, Bedding, and Biosecurity
Daily, Weekly, and Monthly Cleaning Protocols for Chicken Coop Cages
A consistent cleaning schedule prevents disease and keeps your flock productive. Perform these tasks to maintain chicken coop cages in top condition:
- Daily: Remove droppings from perches and floors. Check waterers and feeders for soiling. Spot-clean any wet or soiled areas immediately.
- Weekly: Scrub dropping boards and trays thoroughly. Wash and disinfect waterers and feeders. Replace nesting material if damp or soiled. Inspect ventilation openings for blockages.
- Monthly: Conduct a full deep clean. Remove all old bedding, then scrub wire mesh, walls, and perches with a non‑toxic disinfectant. Rinse and dry completely before reintroducing birds. Check for structural damage like loose wire or broken hinges.
Sticking to this routine breaks pathogen cycles and extends the lifespan of your coop cages.
Bedding Management and Pathogen Control in Standard Chicken Coop Cages
Choose absorbent, non‑toxic bedding—such as pine shavings or straw—and avoid cedar oils, which can harm chickens. Maintain a 2–3 inch layer to capture droppings and reduce ammonia. Replace bedding whenever it becomes caked or wet, and at least twice yearly. Before adding fresh material, sanitize surfaces with a poultry‑safe disinfectant to kill lingering bacteria and parasites. Pair bedding management with strict biosecurity: limit visitor access, use dedicated footwear, and quarantine new birds for at least 30 days. A dry, clean environment inside chicken coop cages drastically lowers the risk of disease outbreaks and supports long-term flock health.
Preventing Common Failures in Chicken Coop Cages
Proactive failure prevention keeps standard chicken coop cages safe and productive over the long term. Predator entry—a leading cause of loss—can be reduced by up to 90% with properly installed hardware cloth and buried perimeter barriers (University of New Hampshire Extension, 2022). Regularly inspect for gaps, rust, or signs of digging, and reinforce latches raccoons can manipulate. Equally critical is fire safety: heating equipment must be guarded, and all wiring kept well away from bedding and birds. Avoid extension cords for permanent power, and never place seed‑starting mats inside a coop—they’re common ignition points. Structural failures often stem from untreated wood rot or loose fasteners, so schedule a quarterly walk‑through to check joints, roof integrity, and anchor stability. Finally, monitor ventilation openings to ensure they remain unobstructed; stagnant air increases ammonia buildup and respiratory stress. Integrating these checks into routine maintenance catches small issues before they become costly failures.
FAQ
What is the ideal foundation for a chicken coop cage?
A foundation made of a 3-inch layer of angular ¾-inch crushed stone is ideal as it promotes drainage, deters weeds, and prevents burrowing pests.
How can I optimize ventilation in chicken coop cages?
Ensure there are adequate openings for airflow and monitor humidity and temperature using hygrometers and thermometers to maintain an ideal range of 50–70% humidity and 65–75°F temperature.
What steps should be taken for biosecurity in chicken coops?
Limit visitor access, use dedicated footwear for the coop, and quarantine new birds for at least 30 days. Additionally, clean and disinfect surfaces regularly.
How often should I replace the bedding in my chicken coop?
Bedding should be replaced whenever it becomes caked or wet and at least twice yearly. Sanitize the surfaces before adding fresh bedding.
How can I prevent structural failure in chicken coop cages?
Regularly inspect for wood rot, loose fasteners, or roof damage. Use treated wood or metal for construction, and anchor the structure securely to prevent shifting.